Quel résultat voulez-vous sur vos produits ?What result do you want on your products?
Choisissez d’abord le ciblageChoose targeting first
Ne choisissez pas encore un code. Commencez par le résultat commercial attendu.
Le même widget sur tous les produits
Idéal pour une campagne, une preuve sociale ou un guide commun à tout le catalogue.
2Un widget pour un produit précis
Idéal pour expliquer un produit, montrer une routine ou ajouter des avis dédiés.
3Un widget différent pour chaque produit
Idéal pour un catalogue où chaque produit possède son propre contenu Snackeet.
Do not choose code yet. Start with the commercial outcome you need.
The same widget on every product
Best for a campaign, social proof, or guidance shared across the catalog.
2One widget for one specific product
Best for product education, a routine, or reviews dedicated to one item.
3A different widget for every product
Best for a catalog where every product has its own Snackeet content.
Choisir Banner ou FloatingChoose Banner or Floating
Le ciblage et l’affichage sont deux décisions différentesTargeting and presentation are separate decisions
Après avoir choisi le cas produit, choisissez la façon dont le widget doit apparaître.
Dans le contenu du produit
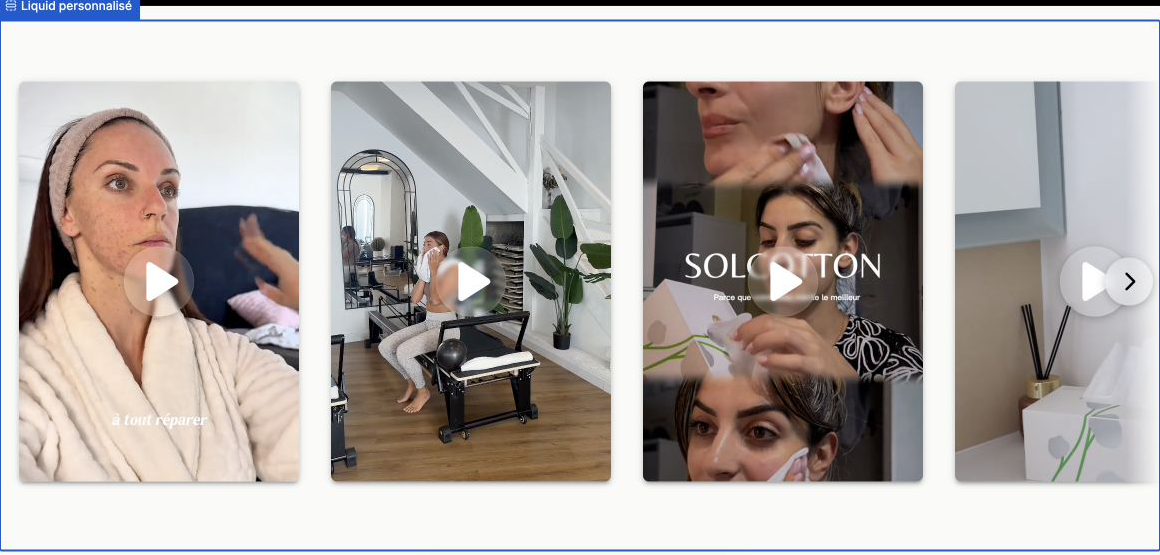
Le Banner occupe de l’espace. Il apparaît exactement à la position de la section Liquid personnalisé.
Au-dessus de la page
Le Floating flotte au-dessus du produit. Sa position desktop/mobile se règle dans Snackeet.
After choosing the product case, choose how the widget should appear.
Inside product content
The Banner occupies space. It appears exactly where the Custom liquid section is placed.
Above the page
The Floating widget overlays the product. Configure its desktop/mobile position in Snackeet.
Avant de commencerBefore starting
Deux accès seulementOnly two things are required
- Le widget Banner ou Floating existe dans Snackeet et son statut est live.
- Vous pouvez ouvrir Shopify Admin → Online Store → Themes → Customize.
- The Banner or Floating widget exists in Snackeet and is live.
- You can open Shopify Admin → Online Store → Themes → Customize.
Récupérer le code depuis SnackeetGet the code from Snackeet
Widgets → Banner/Floating → Integration → Embed code
Le code généré contient déjà le code du projet et l’alias fixe du widget.
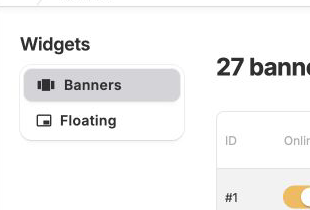
Dans Snackeet, ouvrez Widgets, puis choisissez Banners ou Floating.
Ouvrez le widget voulu, puis l’onglet Integration.
Pour les cas 1 et 2, copiez tout le bloc Embed code. Pour le cas 3, gardez aussi le projectId à portée de main.
Une ligne snktProjectId et une ligne snktDynamicAlias.
The generated code already contains the project code and the widget’s fixed alias.
In Snackeet, open Widgets, then choose Banners or Floating.
Open the required widget, then open Integration.
For Cases 1 and 2, copy the complete Embed code. For Case 3, also keep the projectId nearby.
One snktProjectId line and one snktDynamicAlias line.
 12
12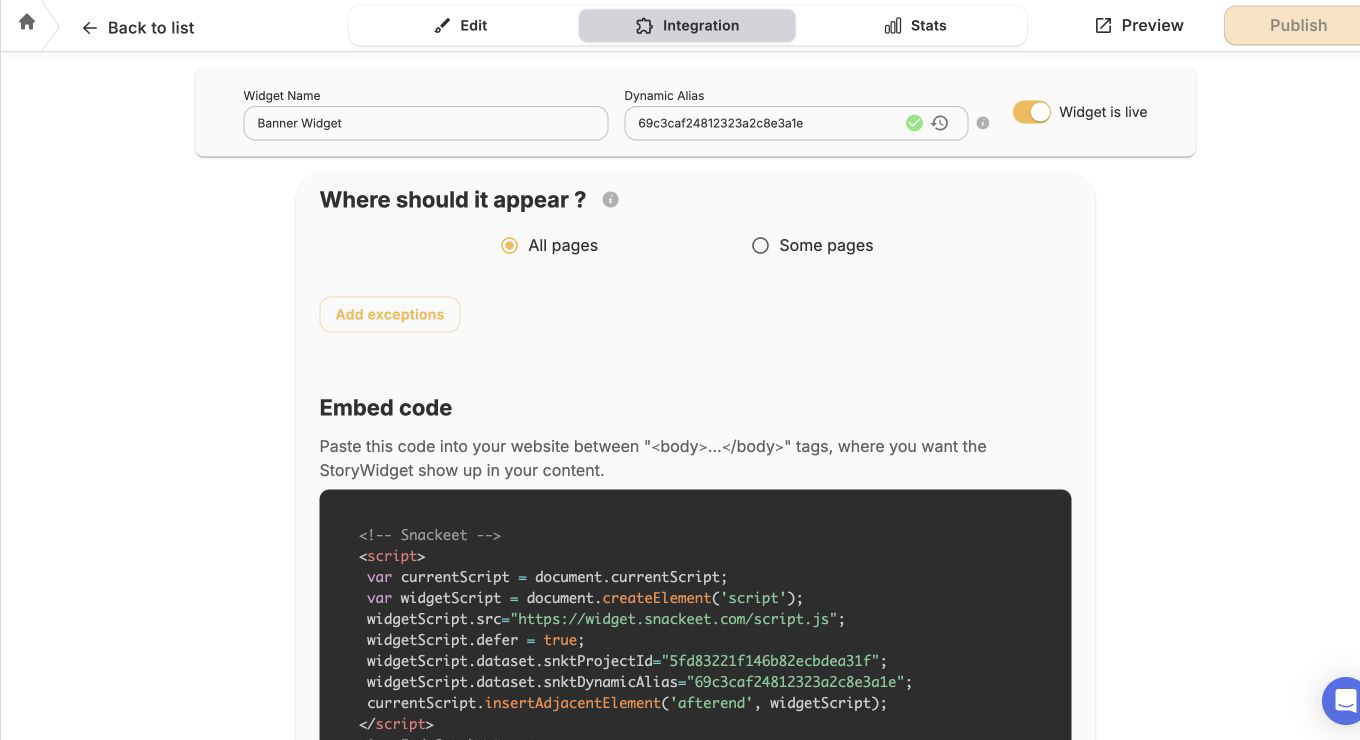 12
12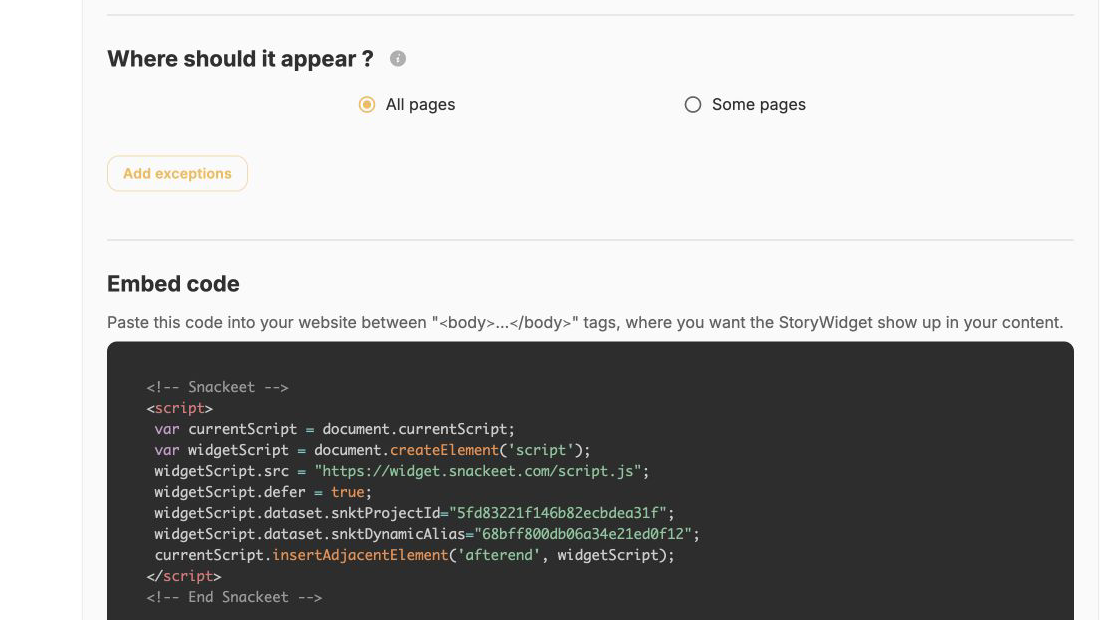
Comprendre les valeurs sans lire le codeUnderstand the values without reading code
projectId · fixed alias · Dynamic Alias · product.id
projectIdLe code de votre projet Snackeet. Plusieurs widgets du même projet peuvent le partager.
La valeur déjà présente dans le code généré. Gardez-la pour les cases 1 et 2.
La valeur utilisée par Snackeet pour choisir le widget correspondant à la page.
{{ product.id }}Une valeur Shopify qui devient automatiquement l’identifiant numérique du produit Shopify actuellement ouvert.
projectIdThe code of your Snackeet project. Several widgets in the same project can share it.
The value already present in generated code. Keep it for Cases 1 and 2.
The value Snackeet uses to choose the widget that belongs to the page.
{{ product.id }}A Shopify value that automatically becomes the numeric Shopify Product ID of the currently open product.
Ouvrir le bon modèle Produit ShopifyOpen the correct Shopify Product template
Online Store → Themes → Customize → Products
Le modèle choisi détermine quels produits recevront le code.
Shopify Admin → Online Store → Themes.
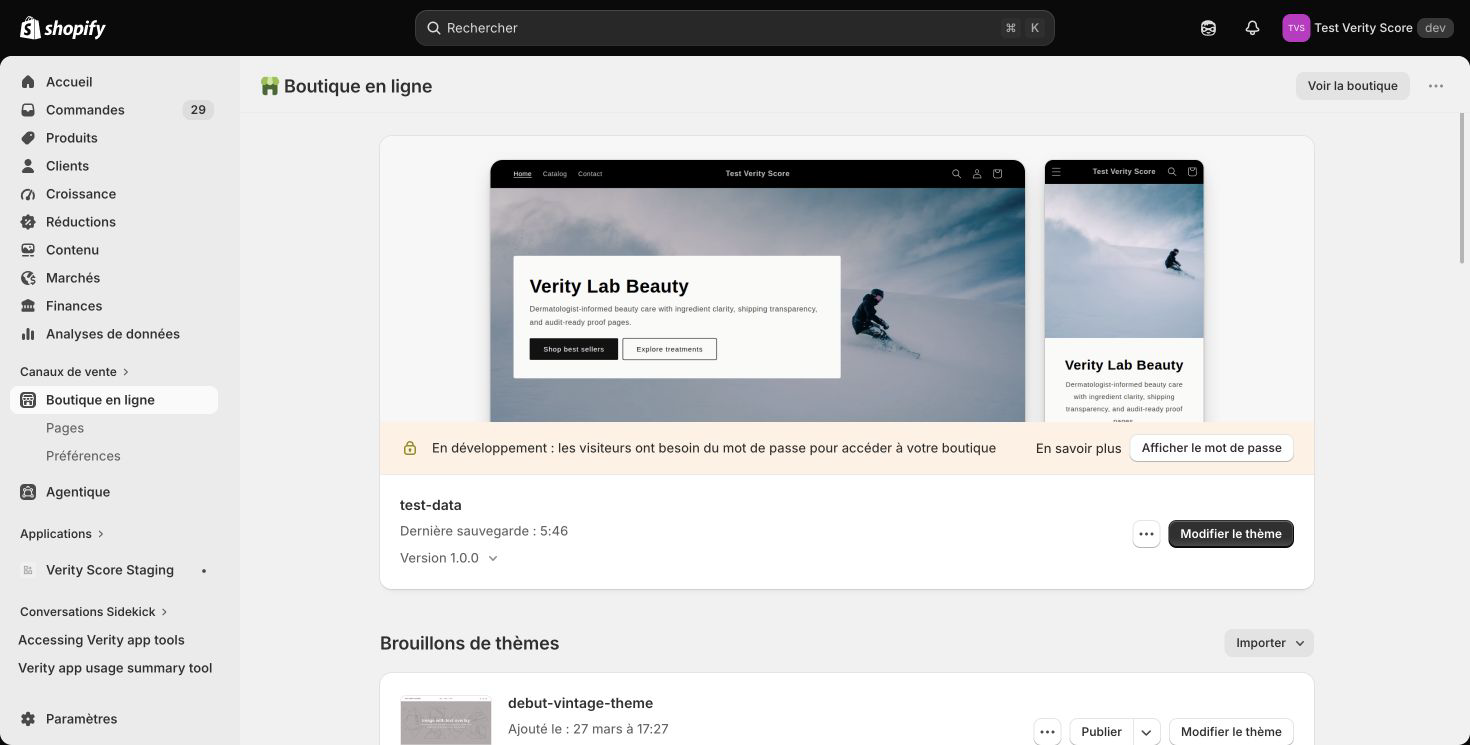
Cliquez sur Customize. En haut, choisissez Products, puis le modèle voulu.
Ajoutez une section Custom liquid / Liquid personnalisé à l’endroit où le code doit être chargé.
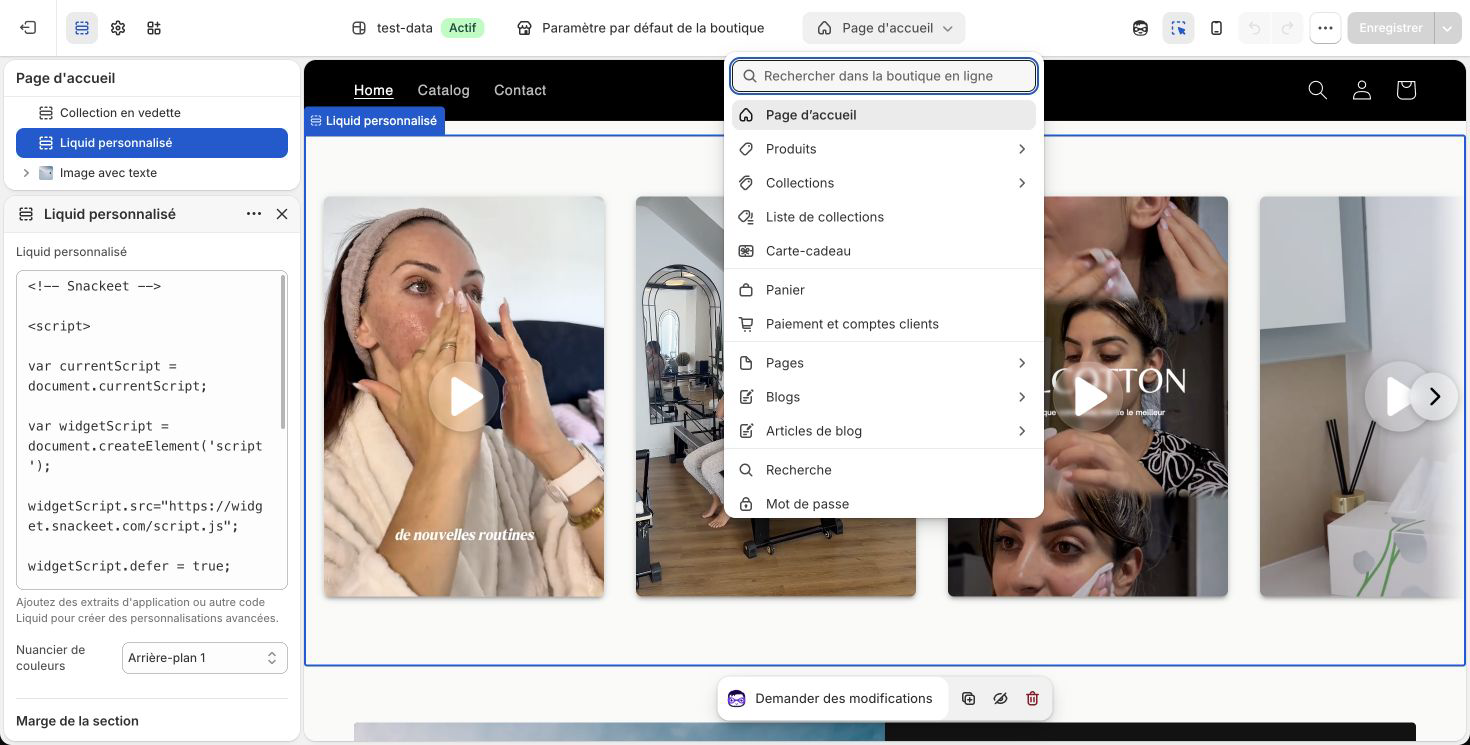
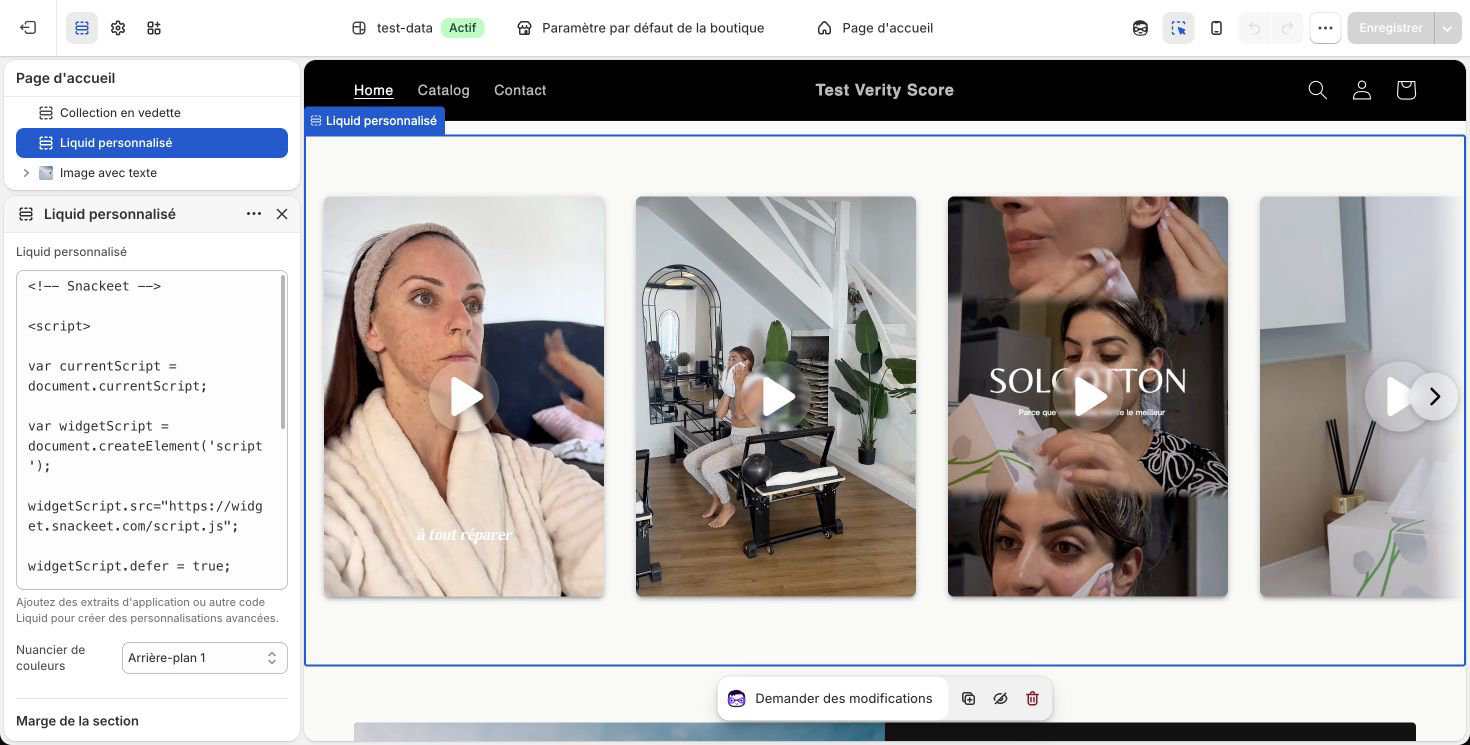
Le modèle Produit sélectionné en haut et la section Liquid personnalisé dans la colonne de gauche.
The selected template determines which products receive the code.
Shopify Admin → Online Store → Themes.
Click Customize. At the top, choose Products, then the required template.
Add a Custom liquid section where the code should load.
The selected Product template at the top and a Custom liquid section in the left panel.
Cas 2 — Un widget pour un produit précisCase 2 — One widget for one specific product
Alias fixe · modèle Produit uniqueFixed alias · unique Product template
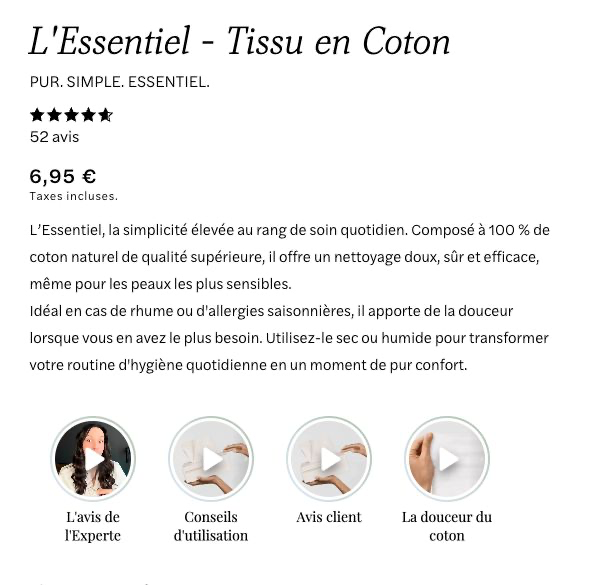
Choisissez ce cas pour une fiche produit qui mérite son propre contenu : démonstration, routine, tutoriel, avis ou Story shoppable.
Dans l’éditeur Shopify, créez ou sélectionnez un modèle Produit réservé à ce produit.
Shopify Admin → Products → ouvrez le produit → attribuez-lui ce modèle unique et vérifiez qu’aucun autre produit ne l’utilise.
Dans Liquid personnalisé, collez le bloc Embed code complet généré par Snackeet, sans modifier l’alias fixe.
Le widget apparaît uniquement sur le produit auquel le modèle unique est attribué.
Choose this case for a product page that needs its own demonstration, routine, tutorial, reviews, or shoppable Story.
In the Shopify editor, create or select a Product template reserved for this product.
Shopify Admin → Products → open the product → assign this unique template and confirm that no other product uses it.
In Custom liquid, paste the complete Embed code generated by Snackeet without changing the fixed alias.
The widget appears only on the product assigned to the unique template.
Cas 3 — Un widget différent pour chaque produitCase 3 — A different widget for every product
Product ID automatique · un seul modèle partagéAutomatic Product ID · one shared template
Si le bouton Choisir un produit Shopify est disponible dans votre app, vous pouvez associer plusieurs widgets sans saisir leurs identifiants à la main. Cette sélection automatique n’est pas disponible pour PrestaShop.
- Connectez votre boutique une seule fois. Si elle est déjà connectée, conservez la connexion. Sinon, suivez le guide de connexion Shopify.
- Vérifiez le code installé avant de changer un alias. Pour cette sélection par Product ID, le code doit utiliser
{{ product.id }}. Installez-le une fois dans chaque modèle Produit partagé concerné, pas dans chaque fiche. La connexion du catalogue seule n’installe pas le widget. - Dans Widgets, choisissez un produit Shopify pour chaque widget. Vous pouvez préparer plusieurs lignes et changer de page. Rien n’est enregistré à cette étape.
- Vérifiez, puis confirmez. Cliquez sur Appliquer, vérifiez les widgets et les anciens/nouveaux alias, puis confirmez. Cela modifie les widgets en ligne. Annuler ferme la confirmation sans enregistrer ; Tout abandonner retire les changements préparés.
Si le bouton n’est pas encore disponible, la méthode manuelle ci-dessous reste utilisable après vérification du code du thème.
cycle-feminin. Si votre code utilise {{ product.handle }}, remplacer seulement cet alias par un Product ID peut faire disparaître le widget. La sélection simplifiée utilise actuellement le Product ID numérique, pas le handle. Ne confirmez pas le remplacement sans faire vérifier le code par la personne qui gère votre thème ou par Snackeet. Nous ne détectons ni ne convertissons automatiquement votre configuration.If Choose Shopify product is available in your app, you can assign several widgets without typing their IDs. This automatic selection is not available for PrestaShop.
- Connect your store once. Keep an existing working connection. Otherwise, follow the Shopify connection guide.
- Check the installed code before changing an alias. For this Product ID selector, the code must use
{{ product.id }}. Install it once in each relevant shared Product template, not on every product page. Connecting the catalog alone does not install the widget. - In Widgets, choose a Shopify product for each widget. You can prepare several rows and change pages. Nothing is saved at this stage.
- Review, then confirm. Click Apply, check the widgets and their old/new aliases, then confirm. This changes live widgets. Cancel closes the confirmation without saving; Discard all removes the staged changes.
If the button is not yet available, the manual method below remains available after checking your theme code.
cycle-feminin. If your code uses {{ product.handle }}, replacing only that alias with a Product ID can make the widget disappear. Simplified selection currently uses the numeric Product ID, not the handle. Do not confirm a replacement until your theme manager or Snackeet has checked the code. Your setup is not detected or converted automatically.Choisissez ce cas pour gérer un catalogue à grande échelle avec un seul modèle Produit.
Shopify Admin → Products → ouvrez le produit que vous voulez associer à un widget.
Dans l’URL Shopify Admin, copiez le nombre situé après /products/. C’est l’identifiant numérique du produit Shopify.
Dans Snackeet, ouvrez le widget correspondant et collez ce nombre dans son champ Dynamic Alias. Dans Shopify, collez ensuite l’un des modèles de code complets ci-dessous.
Chaque page produit affiche automatiquement le widget Snackeet dont l’alias est égal à son Product ID.
/products/example-product contient un handle lisible, pas l’identifiant numérique.Choose this case to manage a large catalog with one shared Product template.
Shopify Admin → Products → open the product you want to match with a widget.
In the Shopify Admin URL, copy the number after /products/. This is the numeric Shopify Product ID.
In Snackeet, open the matching widget and paste this number into its Dynamic Alias field. In Shopify, then paste one of the complete code templates below.
Each product page automatically displays the Snackeet widget whose alias equals its Product ID.
/products/example-product contains a readable handle, not the numeric ID.{{ product.id }}{{ product.id }} tel quel.Dynamic Banner: in the code below, replace only the uppercase text with your projectId. Keep {{ product.id }} unchanged.<!-- Snackeet Banner Widget -->
<script>
var currentScript = document.currentScript;
var widgetScript = document.createElement('script');
widgetScript.src = "https://widget.snackeet.com/script.js";
widgetScript.defer = true;
widgetScript.dataset.snktProjectId = "PASTE_PROJECT_ID_FROM_SNACKEET";
widgetScript.dataset.snktDynamicAlias = "{{ product.id }}";
currentScript.insertAdjacentElement('afterend', widgetScript);
</script>
<!-- End Snackeet -->{{ product.id }} est toujours présent.After pasting: the project placeholder is gone, but {{ product.id }} is still present.{{ product.id }} tel quel.Dynamic Floating: in the code below, replace only the uppercase text with your projectId. Keep {{ product.id }} unchanged.<!-- Snackeet Floating Widget -->
<script>
var currentScript = document.currentScript;
var widgetScript = document.createElement('script');
widgetScript.src = "https://widget.snackeet.com/script.js";
widgetScript.defer = true;
widgetScript.dataset.snktProjectId = "PASTE_PROJECT_ID_FROM_SNACKEET";
widgetScript.dataset.snktDynamicAlias = "{{ product.id }}";
currentScript.insertAdjacentElement('afterend', widgetScript);
</script>
<!-- End Snackeet -->projectId. Leurs alias les distinguent. Installez et testez chaque integration séparément.Multiple widgets on one page: a Banner and Floating widget can share the same projectId. Their aliases distinguish them. Install and test each integration separately.Vérifier sur un vrai produitVerify on a real product
Desktop · mobile · bon produitDesktop · mobile · correct product
Ouvrez Shopify Preview sur un produit réel qui utilise le modèle configuré.
Testez l’aperçu desktop puis mobile. Ouvrez aussi une Story pour confirmer l’interaction.
Cas 1 : même widget partout. Cas 2 : widget uniquement sur le produit ciblé. Cas 3 : widget correspondant au Product ID.
Le bon Banner à la bonne place ou le bon Floating à la position réglée dans Snackeet.
- Le widget est live dans Snackeet.
- Le bon modèle Produit est attribué.
- Le
projectIdvient du bon projet. - Pour le cas 3, le Dynamic Alias Snackeet est exactement le Product ID Shopify.
Open Shopify Preview on a real product that uses the configured template.
Test desktop and mobile preview. Also open a Story to confirm the interaction.
Case 1: same widget everywhere. Case 2: widget only on the intended product. Case 3: widget matching the Product ID.
The right Banner in the right place or the right Floating widget at the position configured in Snackeet.
- The widget is live in Snackeet.
- The correct Product template is assigned.
- The
projectIdcomes from the correct project. - For Case 3, the Snackeet Dynamic Alias exactly matches the Shopify Product ID.
Corriger un problème e-commerceFix an ecommerce issue
Ce que vous voyez · ce qu’il faut faireWhat you see · what to do
| Ce que vous voyez | Ce qu’il faut faire |
|---|---|
| Le même widget apparaît partout, mais vous vouliez un widget différent | Vous utilisez encore un alias fixe. Passez au cas 3 et gardez {{ product.id }}. |
| Aucun widget sur un produit dans le cas dynamique | Vérifiez que le widget est live et que son Dynamic Alias est exactement le Product ID Shopify. |
| Le widget d’un produit apparaît sur plusieurs produits | Le code est dans un modèle partagé. Créez un modèle unique et attribuez-le uniquement au produit ciblé. |
| Votre alias ressemble au texte de l’URL publique (handle) | Vérifiez le code installé : {{ product.handle }} doit correspondre au handle, {{ product.id }} au Product ID numérique. Gardez une configuration qui fonctionne ; ne remplacez pas le handle sans adapter et tester le code du thème. |
| Banner au mauvais endroit | Déplacez la section Liquid personnalisé dans le modèle Produit. |
| Floating au mauvais endroit | Changez sa position desktop/mobile dans Snackeet. |
| Banner fonctionne, Floating non | Vérifiez séparément le code, le statut live et l’alias de chaque integration. |
| What you see | What to do |
|---|---|
| The same widget appears everywhere, but you expected different widgets | You are still using a fixed alias. Switch to Case 3 and keep {{ product.id }}. |
| No widget appears on one product in the dynamic case | Check that the widget is live and its Dynamic Alias exactly matches the Shopify Product ID. |
| A product-specific widget appears on several products | The code is in a shared template. Create a unique template and assign it only to the intended product. |
| Your alias looks like the text in the public URL (handle) | Check the installed code: {{ product.handle }} must match the handle, while {{ product.id }} must match the numeric Product ID. Keep a working setup; do not replace a handle without updating and testing the theme code. |
| Banner is in the wrong place | Move the Custom liquid section in the Product template. |
| Floating widget is in the wrong place | Change its desktop/mobile position in Snackeet. |
| Banner works, Floating does not | Verify each integration’s code, live status, and alias separately. |
Autres pages e-commerceOther ecommerce pages
Après les pages produitAfter product pages
Utilisez ces valeurs uniquement si vous devez cibler d’autres types de pages. La valeur envoyée par Shopify doit correspondre exactement au Dynamic Alias Snackeet.
| Page | Valeur Shopify | Exemple d’usage |
|---|---|---|
| Accueil | home | Une campagne générale |
| Collection | {{ collection.id }} | Un widget par catégorie |
| Page standard | {{ page.id }} | Guide, landing page, FAQ |
| Article | {{ article.id }} | Story liée à un contenu éditorial |
Use these values only when targeting other page types. The value sent by Shopify must exactly match the Snackeet Dynamic Alias.
| Page | Shopify value | Example use |
|---|---|---|
| Homepage | home | A general campaign |
| Collection | {{ collection.id }} | One widget per category |
| Standard page | {{ page.id }} | Guide, landing page, FAQ |
| Article | {{ article.id }} | A Story linked to editorial content |
Facultatif : importer les produits dans SnackeetOptional: import products into Snackeet
Sans rapport avec l’affichage du widgetSeparate from displaying the widget
Connectez votre catalogue pour retrouver les produits dans Snackeet. Cette configuration se fait une fois par boutique, pas une fois par produit. Si vos produits sont déjà accessibles, gardez votre connexion actuelle.
Ouvrir le Shopify Dev Dashboard ↗ · Gardez Snackeet ouvert dans un autre onglet. Les boutons ci-dessous portent leur nom anglais.
Créer l’app
Apps → Create app → Start from Dev Dashboard. Nommez-la Snackeet Catalogue, puis cliquez sur Create.
Configurer et publier la version
Dans Versions, ouvrez ou créez une version. Pour cette connexion sans interface intégrée, utilisez l’App URL par défaut
https://shopify.dev/apps/default-app-home. Désactivez l’intégration dans Shopify Admin si cette option est proposée. Dans Scopes, sélectionnez uniquementread_products. Gardez une version Webhooks API prise en charge proposée par Shopify. Cliquez sur Release et confirmez.La version doit être publiée avant l’installation.
Installer sur la bonne boutique
Home → Install app → votre boutique → Install. Vérifiez le nom de la boutique avant de confirmer. Créer l’app ne suffit pas : elle doit être installée.
Récupérer les trois informations
Dans l’app, ouvrez Settings pour copier le Client ID et le Client Secret. Dans Shopify Admin → Settings → Domains, retrouvez le domaine permanent de la boutique.
Repère visuel — où copier chaque valeur Champ Snackeet Où le trouver À retenir URL de la boutique Shopify Admin → Domains votre-boutique.myshopify.com, sanshttps://ni cheminClient ID Dev Dashboard → app → Settings Identifiant de l’app, pas un Product ID Client Secret Au même endroit À coller uniquement dans le champ sécurisé de Snackeet Connecter dans Snackeet
Ouvrez une webstory en mode édition, puis le menu d’ajout d’élément → Produit et événement → Shopify. Si vous avez déjà un élément Shopify, sélectionnez-le puis cliquez sur Ajouter un nouveau produit dans ses paramètres. Ces deux chemins ouvrent le sélecteur de produits et, sans boutique connectée, le formulaire.
Renseignez URL de la boutique, Client ID et Client Secret, puis cliquez sur Connecter à Shopify. Aucun access token n’est à générer ou à renouveler à la main. Vous pouvez fermer le sélecteur après vérification, sans ajouter de produit à la story.
Vérifier avec un produit
Recherchez un produit connu : son nom doit apparaître, accompagné de son image si elle est disponible. L’absence d’image ne signifie pas que la connexion a échoué. Pour l’affichage sur le site, suivez ensuite le cas 3 : modèle produit dynamique ; la connexion seule n’installe pas le widget.
La connexion ne fonctionne pas ?
| Symptôme | Vérification |
|---|---|
| Domaine refusé | Utilisez le domaine .myshopify.com, sans protocole, espace ni /admin. Le domaine commercial ne convient pas. |
Boutique absente ou erreur shop_not_permitted | Vérifiez que l’app et la boutique appartiennent à la même organisation Shopify. Demandez au propriétaire de créer l’app dans la bonne organisation. |
| App créée, connexion impossible | Vérifiez Versions → Release, puis Home → Install app sur la boutique ciblée. |
| Identifiants refusés | Recopiez les deux valeurs depuis Settings de cette même app, sans espaces. Si le secret a changé, mettez-le à jour dans Snackeet. |
| Connexion réussie, catalogue inaccessible | Vérifiez read_products, publiez la version modifiée et approuvez les droits demandés par Shopify, puis reconnectez dans Snackeet. |
| Liste vide | Effacez la recherche et vérifiez la boutique sélectionnée et ses produits. Si l’erreur persiste, contactez le support avec l’étape bloquante, sans secret. |
Vérifié le 7 septembre 2026 · Sources : création et installation, connexion dans votre organisation, droits d’accès.
Connect your catalog to find products inside Snackeet. Set this up once per store, not once per product. If your products are already available, keep your existing connection.
Open Shopify Dev Dashboard ↗ · Keep Snackeet open in another tab.
Create the app
Apps → Create app → Start from Dev Dashboard. Name it Snackeet Catalogue, then select Create.
Configure and release the version
In Versions, open or create a version. For this connection without an embedded interface, use the default App URL
https://shopify.dev/apps/default-app-home. Turn off embedding in Shopify Admin if offered. Under Scopes, select onlyread_products. Keep a supported Webhooks API version offered by Shopify. Select Release and confirm.Release the version before installing.
Install on the correct store
Home → Install app → your store → Install. Check the store name before confirming. Creating the app alone is not enough: it must be installed.
Find the three connection details
Open the app's Settings to copy the Client ID and Client Secret. Find your permanent store domain in Shopify Admin → Settings → Domains.
Visual reference — where each value comes from Snackeet field Where to find it Remember Shop URL Shopify Admin → Domains your-store.myshopify.com, withouthttps://or a pathClient ID Dev Dashboard → app → Settings The app identifier, not a Product ID Client Secret The same location Paste only into Snackeet's secure field Connect in Snackeet
Open a webstory in the editor, then the add-element menu → Product and event → Shopify. If you already have a Shopify element, select it and choose Add a new product in its settings. Both paths open the product selector and, without a connected store, the connection form.
Fill in Shop URL, Client ID and Client Secret, then select Connect to Shopify. You do not need to generate or renew an access token manually. After checking the catalog, you can close the selector without adding a product to the story.
Check a product
Search for a familiar product: its name should appear, with an image if one is available. A missing image does not mean the connection failed. For storefront display, continue with Case 3: the dynamic product template; connecting the catalog alone does not install a widget.
Connection not working?
| Symptom | What to check |
|---|---|
| Domain rejected | Use the .myshopify.com domain without protocol, spaces or /admin. Your commercial domain will not work. |
Store missing or shop_not_permitted | Check that the app and store belong to the same Shopify organization. Ask the owner to create the app in the correct organization. |
| App created but connection fails | Check Versions → Release, then Home → Install app on the intended store. |
| Credentials rejected | Copy both values again from this app's Settings, without spaces. If the secret changed, update it in Snackeet. |
| Connected but catalog inaccessible | Check read_products, release the updated version and approve permissions requested by Shopify, then reconnect in Snackeet. |
| Empty list | Clear the search and check the selected store and its products. If the issue persists, contact support with the step that failed, without any secret. |
Checked September 7, 2026 · Sources: creation and installation, connecting within your organization, access permissions.
Facultatif : tracking e-commerceOptional: ecommerce tracking
Customer events · Custom pixel
Cette étape mesure les actions e-commerce. Elle n’est pas nécessaire pour afficher un widget.
- Snackeet → Analytics → configuration du tracking Shopify.
- Copiez le script généré pour ce projet.
- Shopify → Settings → Customer events.
- Ajoutez un custom pixel, collez le script, puis cliquez sur Save et Connect.
- Testez un ajout au panier et une commande de test.
| Événement | Ce qu’il mesure |
|---|---|
product_added_to_cart | Un produit a été ajouté au panier. |
checkout_completed | Le checkout Shopify a été terminé. |
This step measures ecommerce actions. It is not required to display a widget.
- Snackeet → Analytics → Shopify tracking setup.
- Copy the script generated for this project.
- Shopify → Settings → Customer events.
- Add a custom pixel, paste the script, then click Save and Connect.
- Test an add-to-cart action and a test order.
| Event | What it measures |
|---|---|
product_added_to_cart | A product was added to the cart. |
checkout_completed | The Shopify checkout was completed. |